The first major addition to The Outlast Trials comes in the form of the Courthouse, with the main Trial being called Vindicate the Guilty. It’s a tough level that offers players new puzzles, mechanics, and threats to evade.
This walkthrough will take you step-by-step to get you through it and back safely to the Murkoff Sleeproom. If you’re looking for some quick tips to get you started, check out 7 Tips and Tricks to Survive The Outlast Trials Courthouse.
Otherwise, let’s get into it.
Note: This guide is specifically for the base difficulty version of The Courthouse: Vindicate The Guilty. Further variations of this Trial alter gameplay elements which this guide does not reflect.
Step 1: Infiltrate the Courthouse
The first step is simply to get inside.
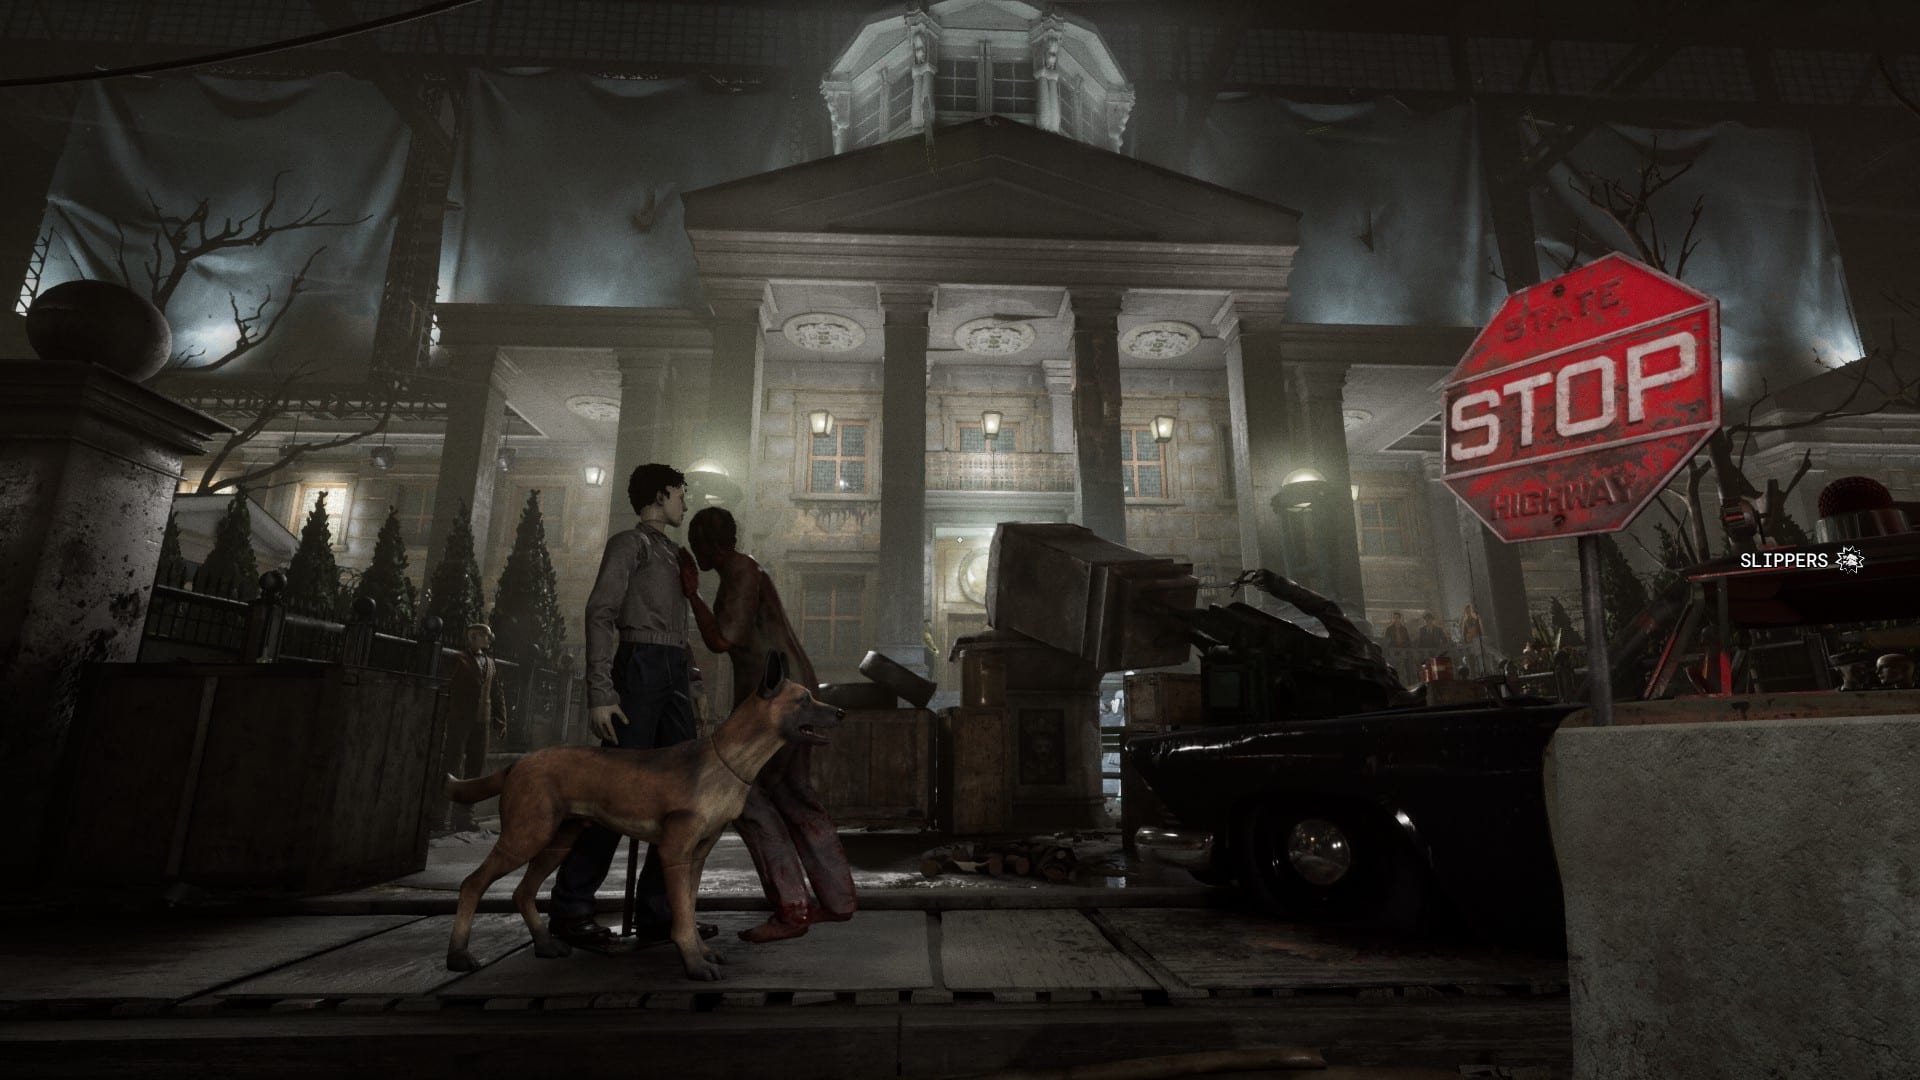
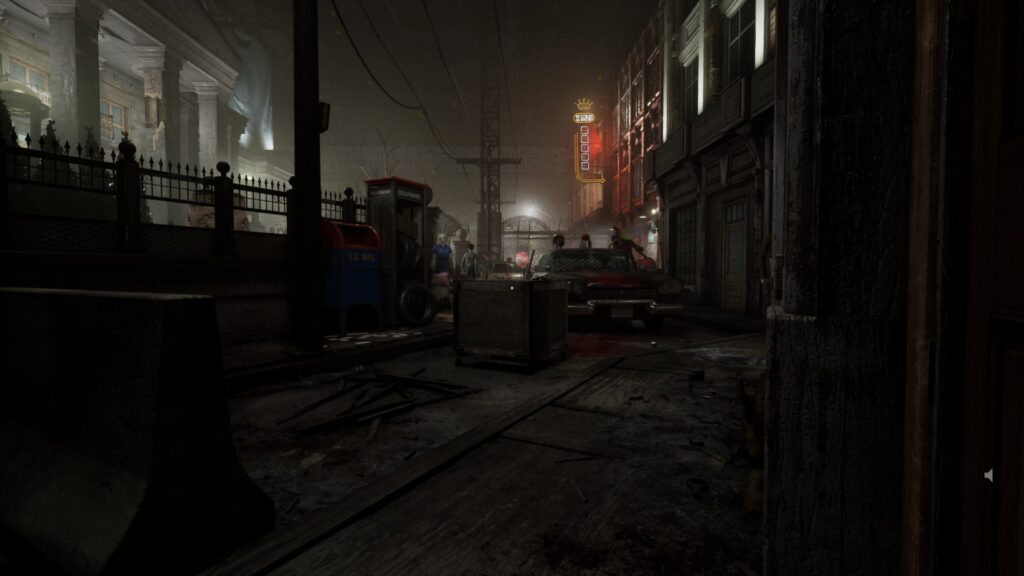
You exit the tram to a dark alley. The Courthouse itself is just a few paces forward, with small buildings on the left and right to explore. Swing by both of these spaces briefly to gather items then continue on, you won’t be coming back here until the very end of the Trial
You’ll come to a street and wide courtyard in front of the Courthouse. Here, you’ll meet Outlast Trials’ newest ex-pop, a giant and very naked lady with an axe. She’s slow and lumbering but hits very hard. She’ll patrol the courtyard and street and chase you as far back as the buildings should you be spotted.
There are a couple more non-combative ex-pops lingering around the courtyard, but as long as you don’t run right up to them, you’ll be fine. Just make sure to give them some room as you run around.
There are three main entrances to the Courthouse:
- The front door
- A window on the far right if you’re facing the Courthouse
- A window on the far left if you’re facing the Courthouse
The far right window might be safest, as you can simply sneak all the way down the street, hug the wall, and hop through the window.
The left window requires you to sneak through the front of the courtyard and go up a side path, which just increases your chances of encountering the large ex-pop. Taking the front door also just increases those risks.
So, take your time, scavenge for items, and make your way past the enemies, and you’ll be inside in no time.
Step 2: Reach The Main Courtroom
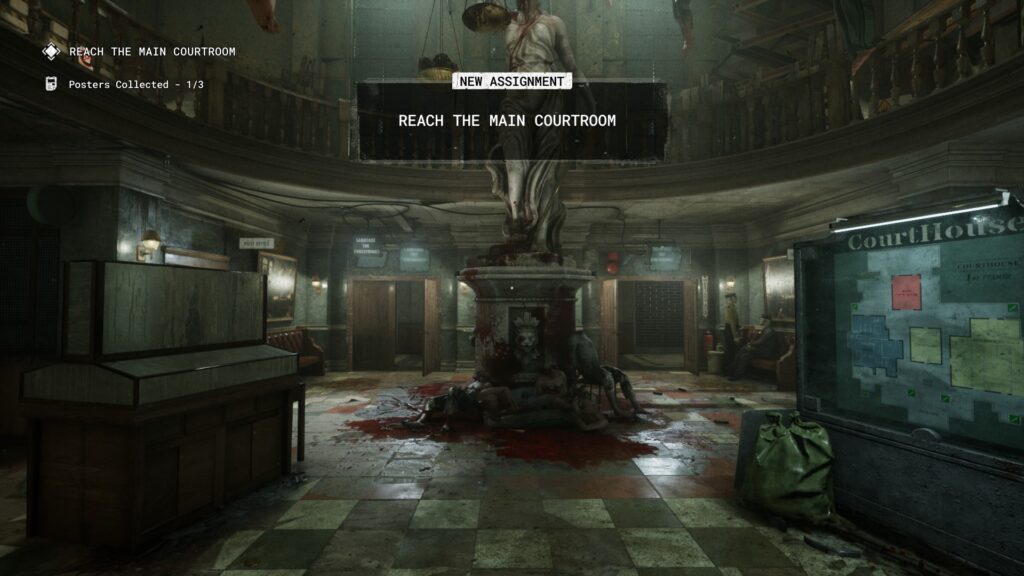
You’re finally inside, well done. It only gets tougher from here.
Like other trials, you need to first make your way to the security checkpoint to initiate the trial itself. You’re officially in the maze that is the Courthouse, and it’s packed with traps, locked rooms, and enemies.
If ever you get lost, you can make your way back to the entrance and check out the map that’s in the foyer.
But, to make it to the main courtroom, all you need to do is head through the Library. It’s on the left as you walk in. Depending on the randomization of the level, you may need to deviate a little bit from the path, but just be sure to work through the library, and you’ll make it.
Inside the library, you’ll find the usual scattering of items like bottles and antidotes, but you’ll also find your first aggressive enemies outside of the initial ex-pop outside. You’ll definitely encounter a machete-wielding Grunt, and you could potentially encounter a Screamer or Pouncer at any point.
It’s mazelike, with blocked paths and fallen shelves, but pick around, and you’ll soon come to an exit that leads back to the marbled floors of the main foyer, but the checkpoint will be on your left.
Step 3: Unlock The Evidence

After a brief courtroom drama, the door on the far left, labeled “Jury Room,” will open. Inside, you’ll find one of the new puzzles added to the Courthouse Trial.
You’ll find a small box on the table in the middle of the room. Activating the box will illuminate the room in a black light which will reveal a hidden 4-digit code that you need to unlock the box.
The code will be written on the wall in various places, some hidden, some easily visible.
Beside each number will be a triangle divided into three segments. The digit with an EMPTY triangle beside it is first, then each number in order is followed by how filled in the triangle is.
Punch in the code, grab the severed head from the container you opened, loot the room, and then proceed through the security checkpoint.
Step 4: Deliver The Evidence
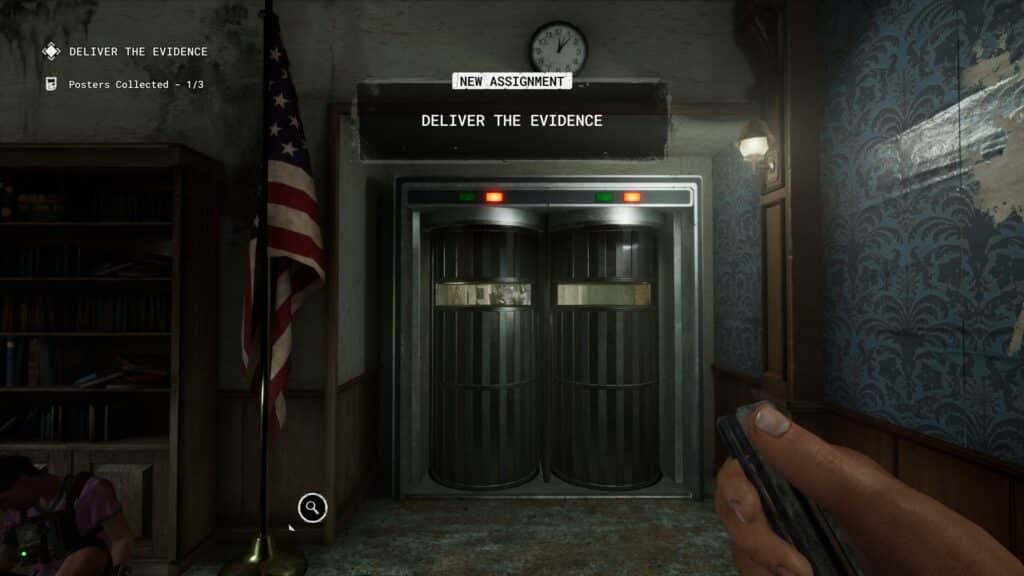
This is a short one. As soon as you pass through the checkpoint, you’ll see a shutter open in front of you. Simply drop the head in the ornate fountain in the center of the courtyard, and you’re done.
Step 5: Gather Acid To Pour Into The Fountain
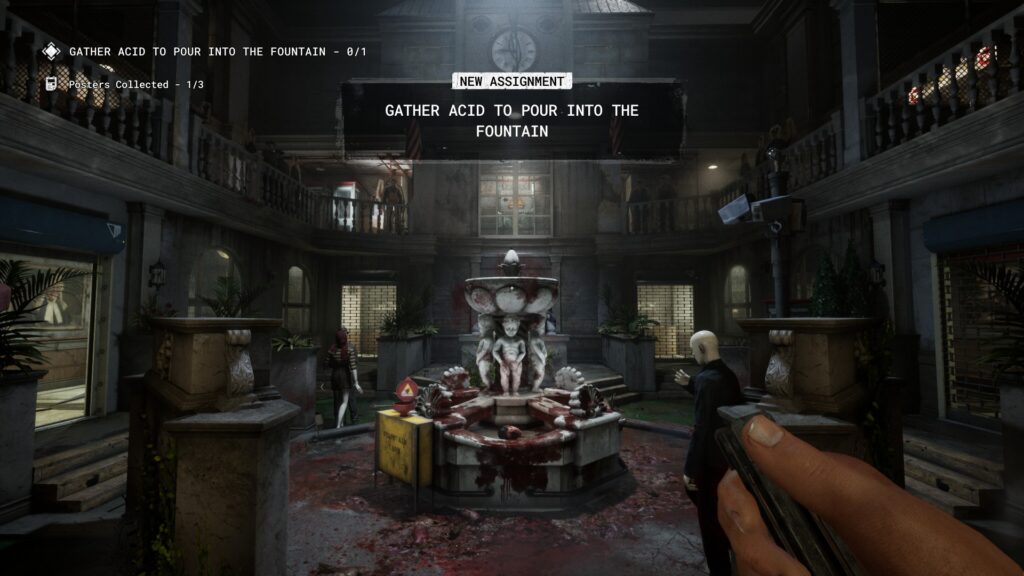
This is where the real Trial begins. You’re going to encounter multiple floors, many enemies, and lots of objectives so get ready.
As soon as you drop the head in, you’ll see the shutter on the left open up. Head that way. Go in there and head left to find a door that leads to a bathroom. There will always be a can of acid here to start you off. Grab it and head back to the fountain and pour it in.
Step 6: Destroy The Remaining Evidence
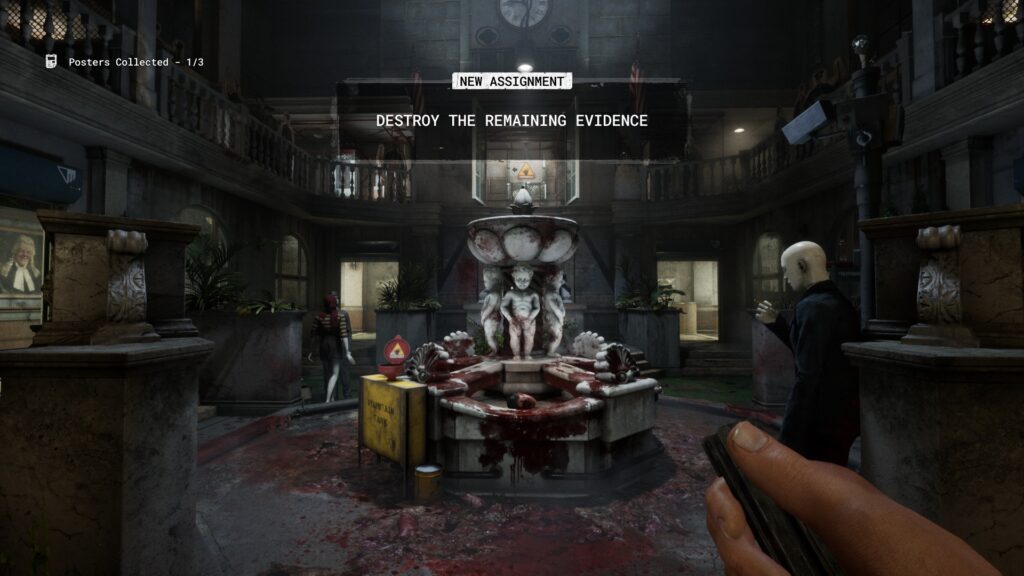
Now, on the base difficulty of the trial, you need to gather two more pieces of evidence and one more bucket of acid to complete the set.
First, head left through the gate that just opened. Dodge some traps or broken glass that should be littering the floor, and then head right into the rig-restricted zone.
This is a very dangerous area, as Coyle patrols around here. Be sure to stock on throwable bricks or bottles in case of a run-in. One of the pieces of evidence should be in either Evidence Room E or Evidence Room F. It’s the same black-light code puzzles the first one, so hit the button and search around.
Be sure to look on the shelves and on the sides of the desks for any numbers; they can be easy to miss.
Grab the severed head from the room and head straight back to the fountain.
Once tossed in, head straight back to the rig-restricted zone. You need to explore deeper to find the severed head. It will always be in one of the rooms labeled Evidence, so just keep looking around while locking doors behind you and avoiding Coyle at all costs.
Solve the puzzle, grab the head, and sneak back to the fountain.
Once you’re done with this, once again head back but instead of going into the rig-restricted zone with Coyle, head upstairs.
Here, you’ll find several rooms under construction with lots of hiding spots and small walls to crawl through. In one of these rooms, you should find the last remaining bucket of acid needed. It will show up on your HUD when you’re close, so sneak around and watch out for the ex-pop with night vision goggles, as he patrols up here. Thankfully you can use your rig so get ready to fight him if needed.
Once you grab it, head back the way you came and pour the acid in the fountain.
Step 7: Return to the Courtroom
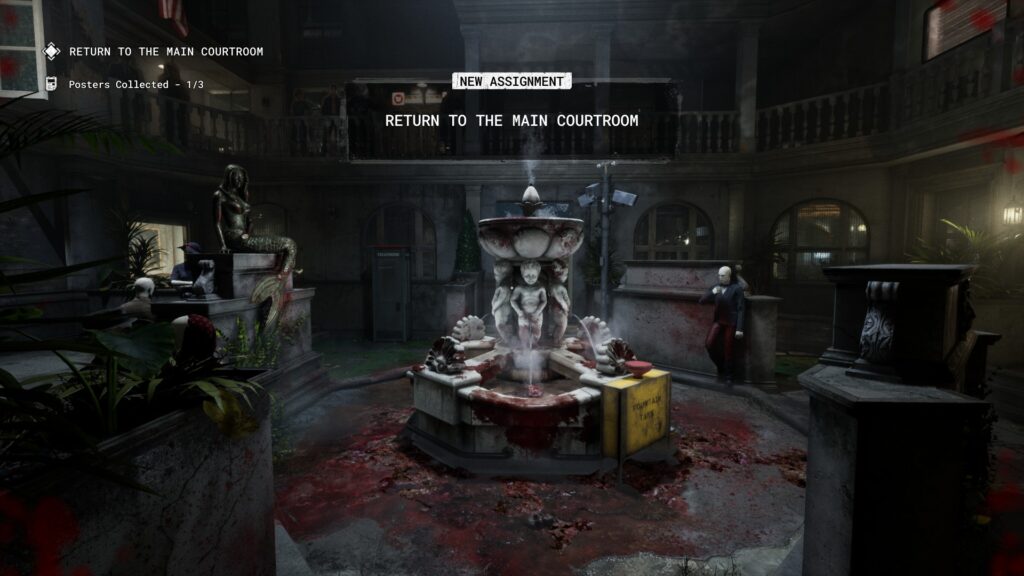
Super easy, just head back through the security checkpoint and watch a small cutscene in the main courtroom.
Step 8: Kill the Witness
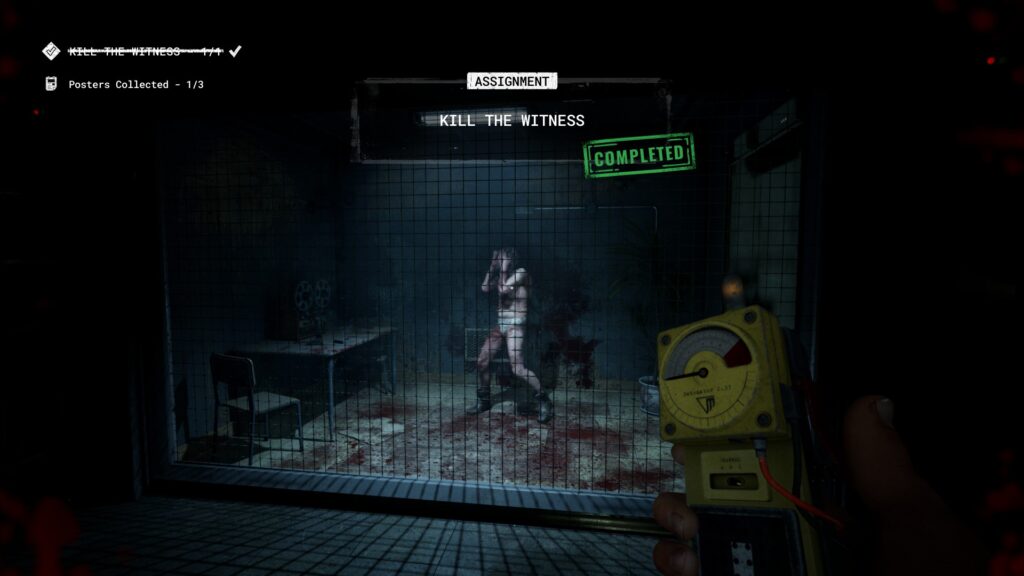
Also super easy, head through the door on the left side of the courtroom that just opened. Grab the Trigger on the podium and use it to kill the witness behind the glass. You need to aim at him until you see the yellow light on the trigger, then click and hold to charge up a hit on him. You’ll need to do this three times.
Step 9: Kill the remaining witnesses
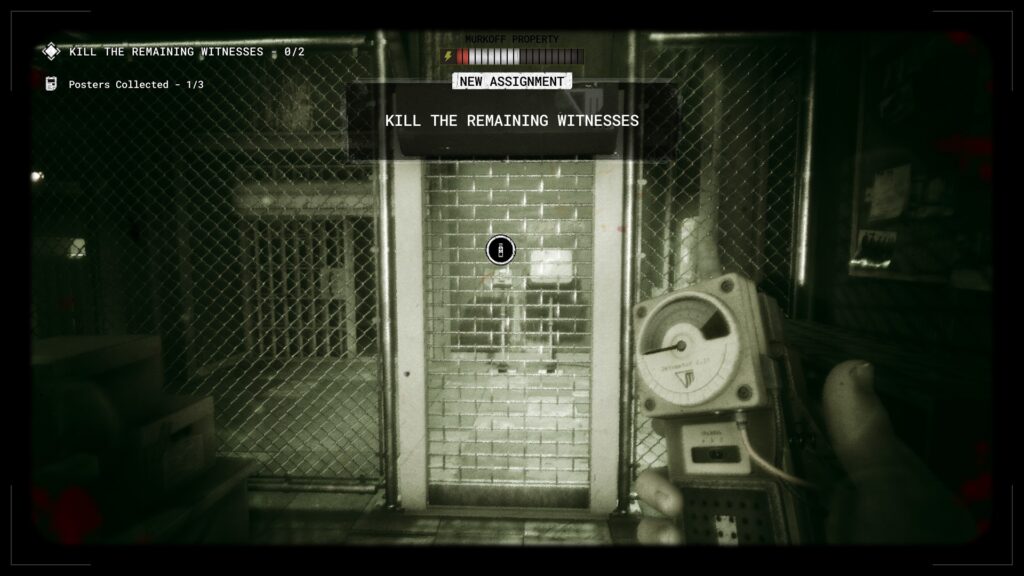
Okay, same thing here but on a bigger scale. You’ll need to track down two more witnesses and blast them like the first one. You can grab a locator device on a nearby podium and use it to help find the witnesses.
Be sure to sneak because if they hear you, they’ll dash into a nearby elevator and relocate nearby.
Head through the checkpoint and you’ll find yourself in a lobby with a staircase on the right. Go up there and pass through a rig-restricted gate. There should be one witness somewhere in one of these rooms. Scout around and be sure to make as little noise as possible to not scare the witness away. Watch out for ex-pops hiding in barrels or closets, and skirt around a machete-wielding ex-pop who patrols upstairs.
Once dead, you need to track down the last witness. Head back downstairs to the lobby. You’ll find an entrance to the library we passed through earlier, and this is where the witness will be hiding.
This area is very maze-like, with lots of blocked hallways, side rooms, and shortcuts. The witness will rarely be in a main hallway where he’s easily accessible; he’ll be hiding in the side rooms or behind knocked-over shelving. Search carefully and keep an eye out for side rooms.
While down here, watch out for a large ex-pop who wanders around here.
Once you kill the witness, head back to the Courtroom for one final task.
Step 10: Return to the Main Courtroom
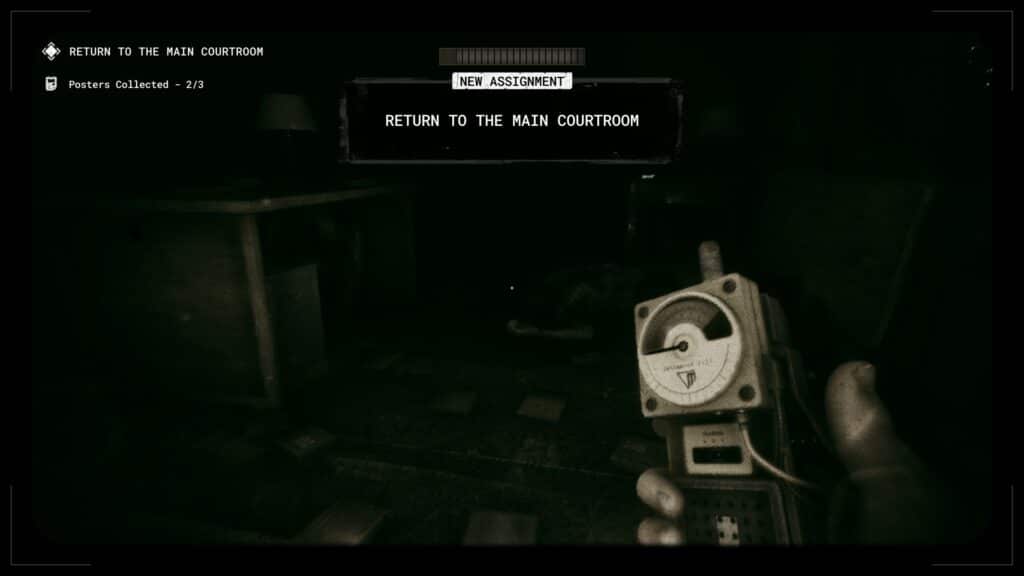
Backtrack to the main courtroom, pass through the security checkpoint, and hit the red button.
Step 11: Execute the Judge
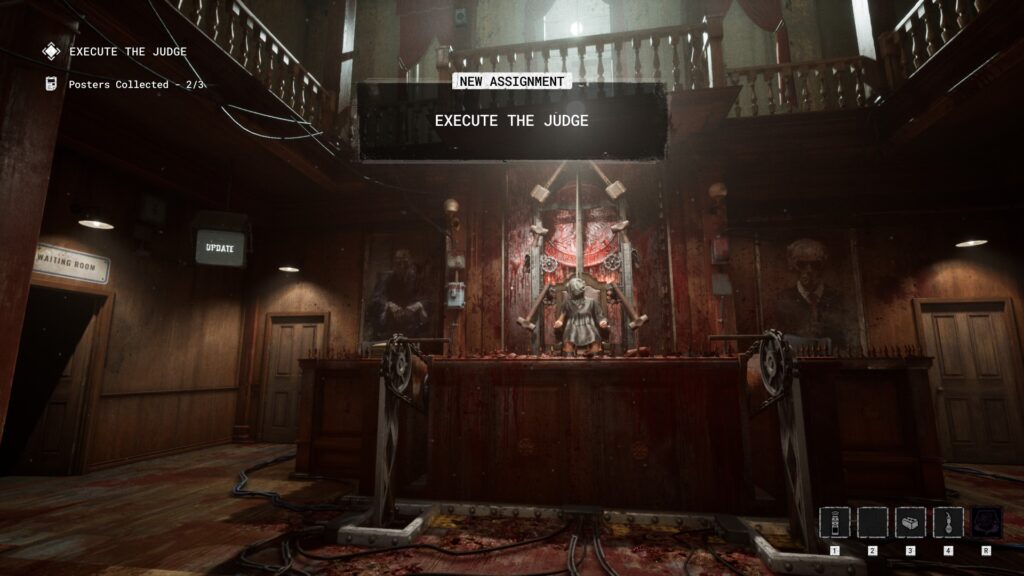
Okay, the last big step.
Once you hit the red button, you need to follow the blue cords on the ground. They’ll lead you to the room behind where the judge is sitting. Crouch and keep an eye on the cords, as they’re easy to lose.
Coyle will be patrolling this backroom, so stay hidden and chase down the cords to a terminal that needs tinkering. The room is long but not very deep, and you’ll find one terminal on either end. Be ready to use your rig if you have the blinding trap or the stun rig, or use bottles to distract Coyle while you work on the terminal.
Once you’ve finished, sneak back to the main courtroom and begin to crank the wheels in front of the Judge. This takes a moment, and you’re at risk of being attacked while doing so. Make sure you aren’t followed out of the back room, or place traps to buy some time while you work.
Once that’s done, you’re at the last step of the trial!
Step 12: Exit the Trial
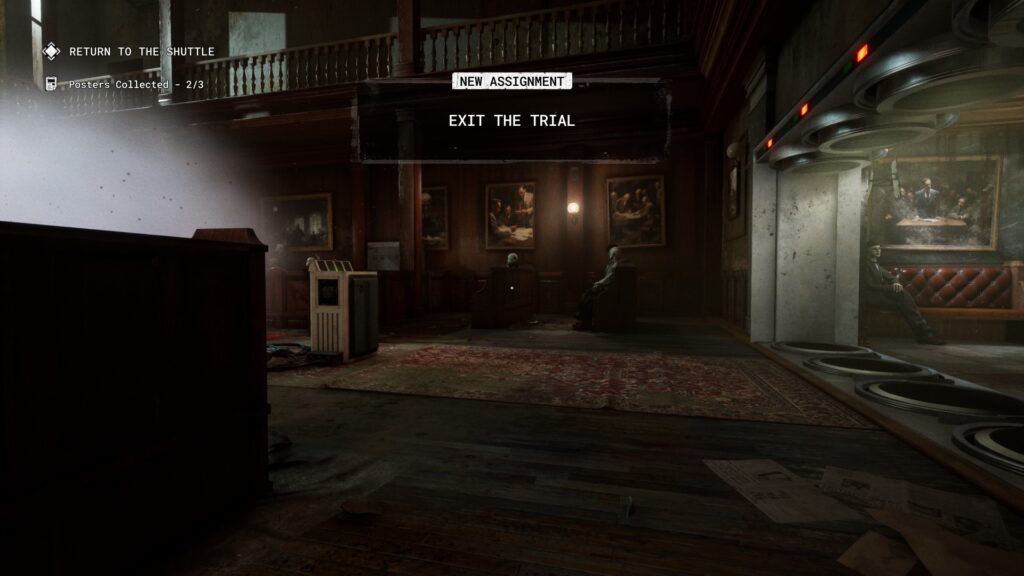
Once the Judge has met her fate, all previous security checkpoints will open. You’ll see this at the front door to the courtroom, creating a mostly straight shot out of the Courthouse.
Be careful though; you’ll find more ex-pops running around the Courthouse, including a large one that will down you in one or two hits.
Take it slow and pick your way out the same way you came in initially, climbing through the window in the side room.
Once back at the tram, you’ll need to wait for it to arrive like all other trials. Just hunker down, set traps if you can, and you’ll be out in no time.
Trial Complete
You did it, well done. I’m sure the Murkoff employee supervising the Trial will give you a low grade and demean you for trying. Oh well, I guess that’s why we play this game.
The Courthouse is a fun and challenging Trial, and the extra variations and smaller Trials are even better. Let us know if more guides are needed for The Outlast Trials.